

IP allowlist
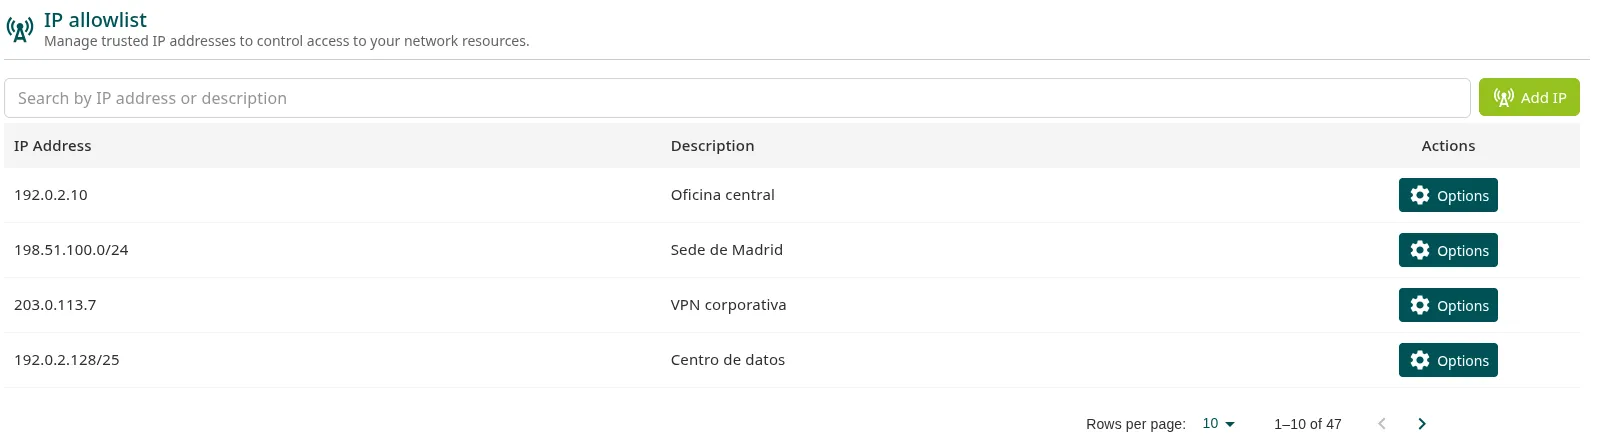
The IP allowlist (Security > IP allowlist) limits the addresses from which your company’s admin console can be used. This page is for whoever administers the console: it explains how the list works and how to add, edit and delete its entries without locking yourself out.
How it works
Section titled “How it works”- While the list is empty, there is no restriction: the console can be reached from any address.
- As soon as it has one entry, the console only accepts connections from the addresses and ranges on the list, and the API rejects signed-in requests that come from any other address.
Anyone who tries to sign in from an address that is not on the list sees the Access Denied page (Your IP address is not allowed, at the /error_net path), with the address they are connecting from and the Try again button.
Each entry is an IP address (192.0.2.10) or a range in CIDR notation (192.0.2.0/24).
Before you start
Section titled “Before you start”- You need permission on the IP Allowlist Management resource: Read to see the list, Write to add, Update to edit and Delete to delete. See Roles and permissions.
- Have at hand the public addresses from which the console is administered: your office’s, the corporate VPN’s or your own.
Add an address
Section titled “Add an address”-
Go to Security > IP allowlist and click Add IP.
-
In the Add a new IP address window, enter the address or range in IP Address, for example
192.0.2.10or192.0.2.0/24. To use the public address you are connecting from, click Add current IP address. -
If you want, enter in Description what the entry is for, for example
Head office.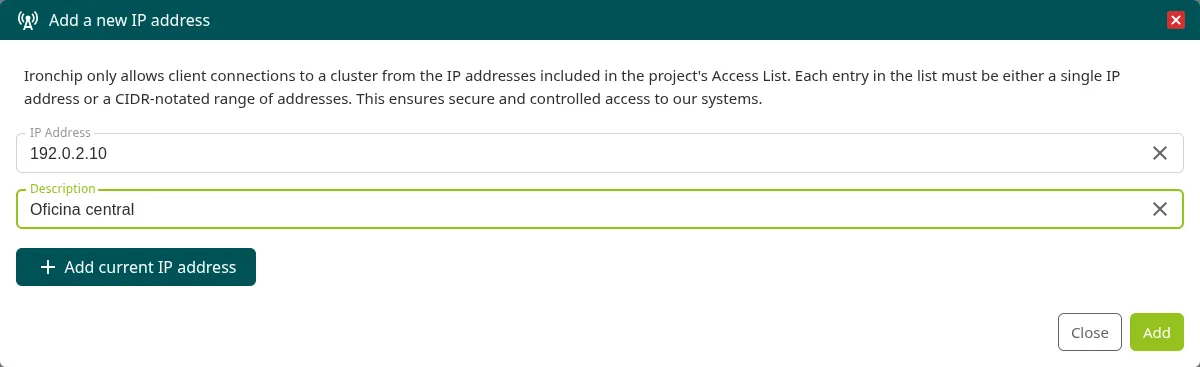
-
Click Add.
-
In the Add IP address window, enter the address to confirm and click Add. The console confirms with IP Address Added.
Edit or delete an address
Section titled “Edit or delete an address”In Security > IP allowlist, find the entry with Search by IP address or description and use the buttons in the Actions column:
- Edit IP: opens the Edit IP address window to change the address or the description. Save with Edit.
- Delete IP: opens the Delete IP address window. Enter the address to confirm and click Delete.
If you delete the last entry, the list becomes empty and the console accepts connections from any address again.
If you are locked out
Section titled “If you are locked out”If the console shows you Access Denied, the address you are connecting from is not on the list. Connect from an allowed address, for example from the office or the corporate VPN, or ask another administrator to sign in from one of them and add yours. If nobody in the company can sign in, write to Ironchip support.
Was this page helpful?
Thank you. We will use it to improve the documentation. If you want to tell us what is missing or unclear, write to support@ironchip.com.