

Look & feel
In Account settings > Look & feel you put your company’s logos and colors on what your users see: the Ironchip web pages where they authenticate and the mobile app. This page is for whoever administers the console.
Before you start
Section titled “Before you start”- You need permission on the Company resource: Read to see the page and Update to save the changes. Without it, the console shows Unable to access look and feel page. See Roles and permissions.
- Prepare the logos in
.png,.jpg,.jpegor.svg, 1 MB at most each.
What you can customize
Section titled “What you can customize”The page has two tabs, which are saved separately:
| Tab | Where it is seen | Logos (Assets) | Colors (Colors) |
|---|---|---|---|
| Web | The Ironchip web pages where your users authenticate, such as Sign in with Ironchip and Verify it’s you. | Header logo and Main logo | Primary color, Secondary color and Background color |
| Mobile | The Ironchip mobile app, for example the authorization request (Authorization required). | Logo | Primary color and Secondary color |
Change the look
Section titled “Change the look”-
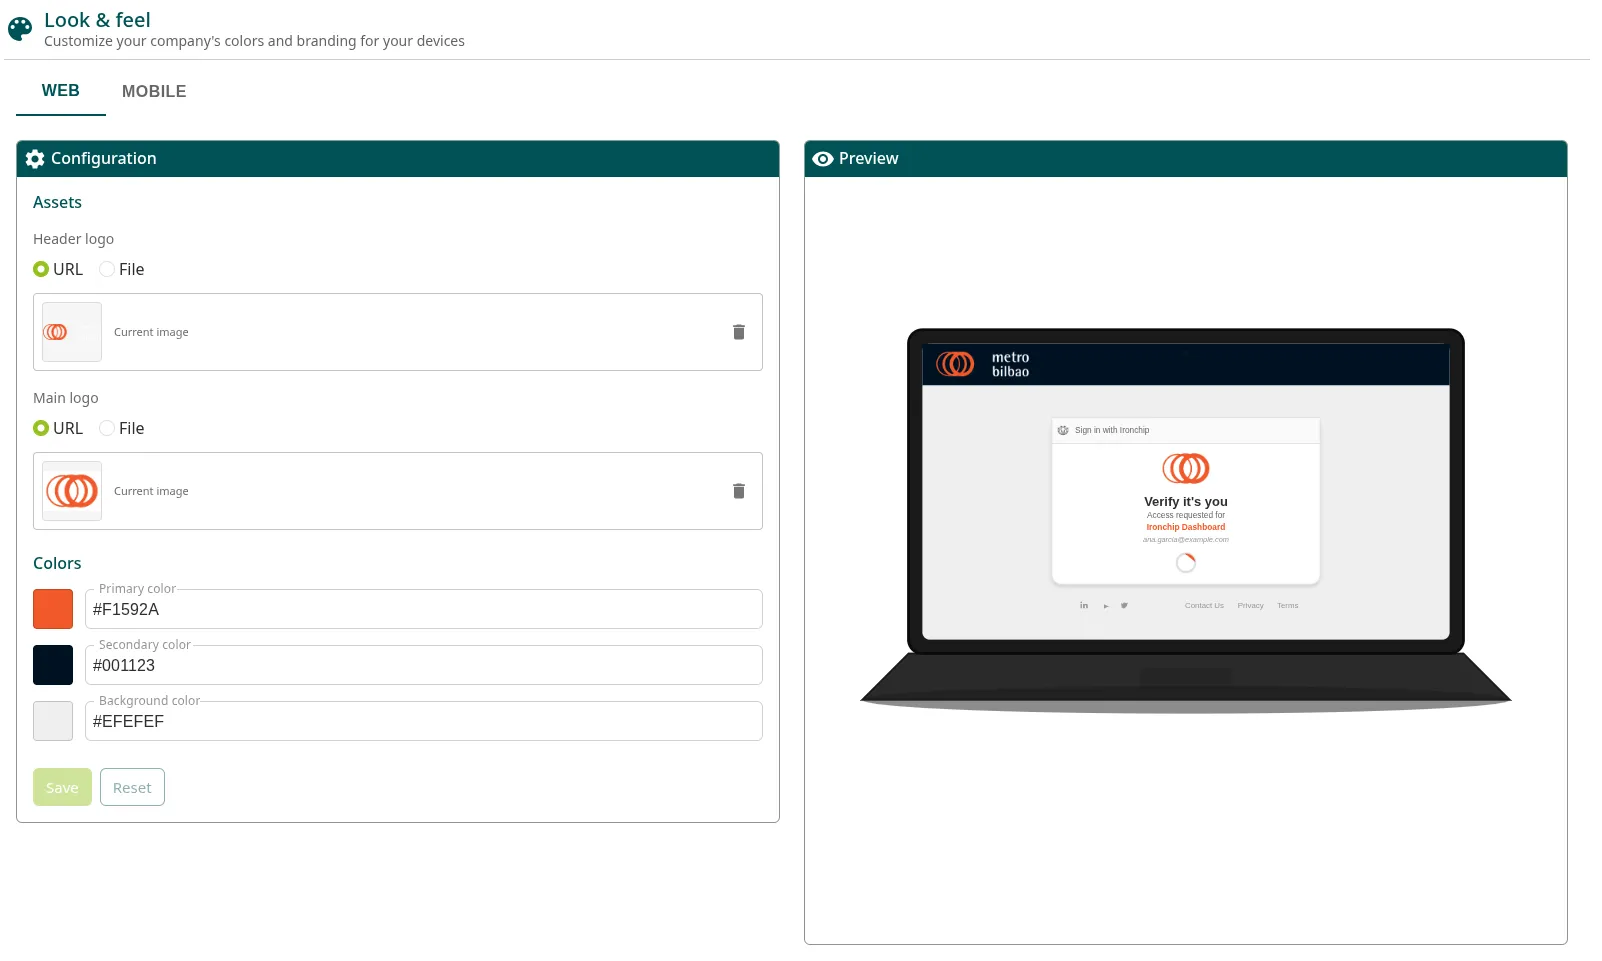
Go to Account settings > Look & feel and choose the Web or Mobile tab.
-
In Assets, for each logo choose File and upload the image, or URL and enter its address. If the image does not load from its address, usually because the website hosting it does not allow it to be used from other sites, download it and upload it as a file.
-
In Colors, choose each color.
-
Check the result in the preview (Preview), which changes as you edit.
-
Click Save. The console confirms with Skin updated successfully.
Users see the new look when they close and reopen the application. To discard the changes you have not saved yet, click Reset: the tab goes back to what you last saved.
To publish an app with your company’s name and look in the stores or through MDM, see Custom app.
Was this page helpful?
Thank you. We will use it to improve the documentation. If you want to tell us what is missing or unclear, write to support@ironchip.com.