User manual
Index
- Introduction to the guide
- Our product
- Download process
- Registration process
- Authentication process
- Recovery process
- Generating safe zones
- Windows Log On
- Linux Log On
- Web services
- FAQ'S
Introduction to the guide
This guide provides a detailed description of the use of the Location Identity service.
We will provide details for the correct use of our platform. This guide facilitates the handling of the functions, allowing the mastery of all the features offered by our service. In addition we will show the steps to follow in the tasks to be performed in order to provide the user with a tool that ensures the security of access and companies through a good and easy daily experience.
Our product, Location Identity Platform
Our Identity Platform product aims to provide companies with the highest level of security and ensure control of all corporate access to the company. This platform, which can be integrated with more than 5,000 services or applications, has the capacity to monitor all accesses and configure rules or identity factors according to security policies, to determine the identity of users and thus authorize access to the corporation's different applications.
Applications of the corporation.
Ironchip's identity solution is composed of different elements that allow authentication to the services in different ways/systems and are explained below:
Authentication platform
An authentication platform is any system that is used to identify the user or employee of the company to verify their identity. For example, a mobile application, USB or desktop application can be used to verify the identity factors required to grant access.
Authentication Application
This section shows the interface of the Ironchip authentication application. This application serves as an authentication method to enter the different services of the company.
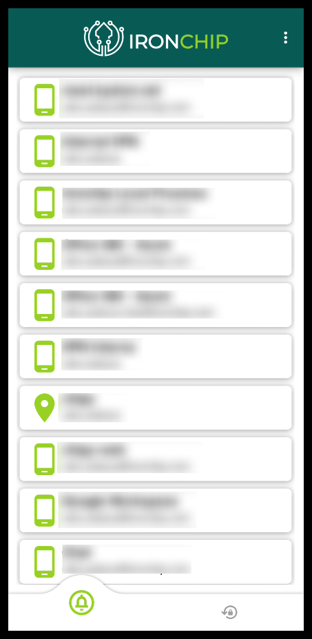
It has two main tabs:
- Main tab: In this section you will be able to see the services of the company to which you have access.
- Secure zones tab: In this section, you will see the usual zones from which you usually access your services, as well as the zones that you have created manually.
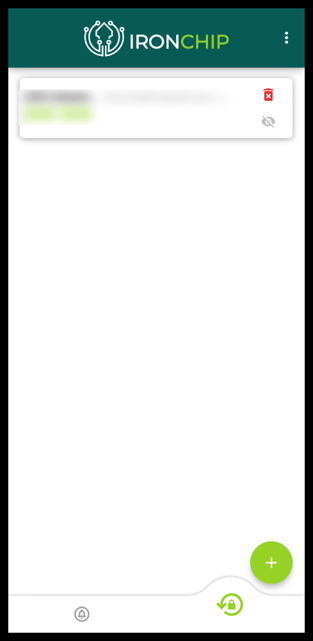
- Secure zones tab: In this section you will see your usual zones from which you usually access the services, as well as the zones that you have created manually.
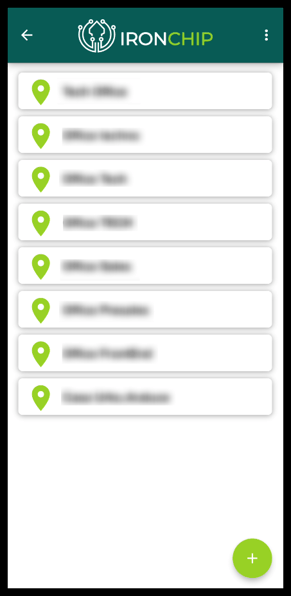
What is a safe zone?
It is an area from which the user typically operates. A fraudulent operation tends to be carried out from a location away from secure zones.
In addition, a secure zone is a unique and unmappable geographic location. An administrator can force users to authenticate only from the secure zone that has been established.
The secure zone concept is also complemented by the Ironchip device recognition system.
Download process
Downloading the authentication application is done differently depending on the platform on which you want to install it.
Android
To download the authentication application on an Android mobile device, you must first go to the "Play Store" application, easily found via the following icon:
Once inside, go to the top search bar and enter "Ironchip".
Then click on the lower left magnifying glass to perform the search.
Once done, select the "Ironchip Authenticator" application and click on install to start the installation:
Once you have clicked the button, the download and installation process will start.
When the application has finished, the "Install" button will have changed to "Open" and the authentication application will be among those you already have installed.
IOS
To download the authentication application on an Apple mobile device, go to the "Apple Store" application, which can be easily found by clicking on the icon below.
Then click on the bottom left magnifying glass to perform the search. Once done, select the "Ironchip Authenticator" application and click on Install to start the installation:
When the installation is complete, the "Install" button will have changed to "Open" and the authentication application will be among those you already have installed.
How to know the version of your application?
To know the current version of your mobile application, you must follow the steps below:
1. Access your "Ironchip Authenticator" application.
2. At the top right, you will find an icon with three dots.
3. When you click on them, you will be presented with a panel with three different options:
a. "Account information"
b. "App Information"
c. OTP
4. To finish your query, click on the "App Information" option and the following message will appear with the version currently downloaded on your device.

Windows Desktop
The Windows desktop application installer must be provided to you by a technical administrator of your company.
Once you have this installer at your disposal, proceed to run it by double clicking on its icon:
First, the Ironchip license will appear, where the terms of use are informed. Proceed to read it and once understood check the field "I accept the terms in the License Agreement" to proceed with the installation, then click "Next".
Then Select "Ironchip Windows Logon" and proceed to click on "Entire feature will be unavailable" to prevent the installation of the "Windows Logon" product.
Click "Next" to continue and, on the next installer screen, keep the default value "https://api.ironchip.com":
Click "Next" to continue, on the next screen enter the API Key supplied by your administrator, you must request it from your administrator if you do not have it:
Finally, click "Next" and "Install" on the next screen to proceed with the installation.
Note that administrative permissions on the computer are required for a successful installation:
Click on "Finish" to close the installation.
Registration Process
In the services tab you will find all the services to which you have access, including the "Ironchip Management Panel", if so desired by the customer.
Remember that the "Ironchip Management Panel" service is exclusive for the selected Administrators, who will be in charge of managing authentications and access to the services.
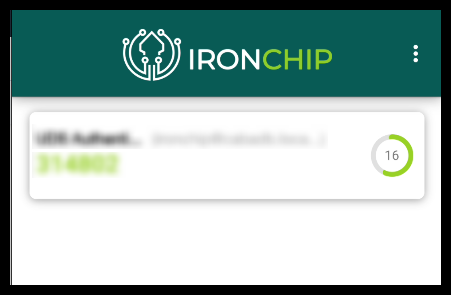
In these services a countdown will appear if authentication has been required in the service.
Registration via mobile application
To proceed to register the authentication application you must first download it.
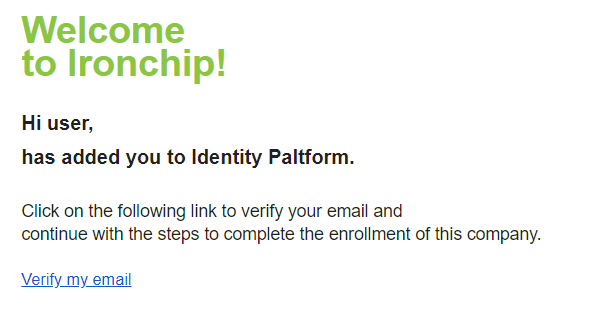
To register an Administrator will have registered you in the control panel, "Management Panel". You will then receive an email for verification and the following steps will be followed:
- Click on the "Verify my email" button in the email.
If you have already downloaded the application, click on "Continue", otherwise you can download it by clicking on the corresponding image.
Se abrirá la aplicación y se aceptarán los permisos pertinentes.
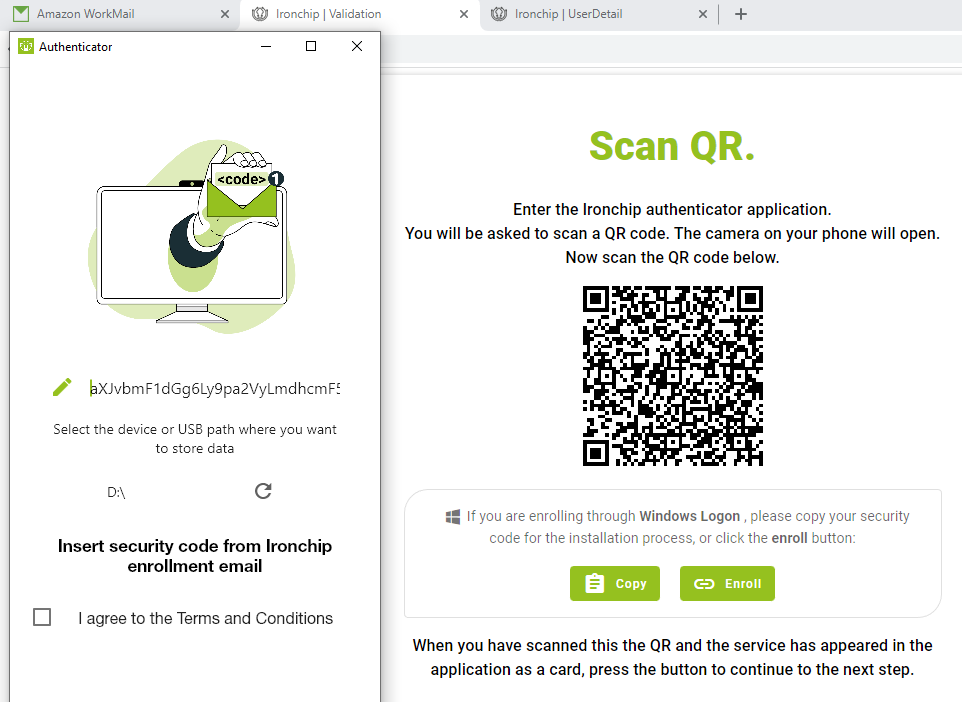
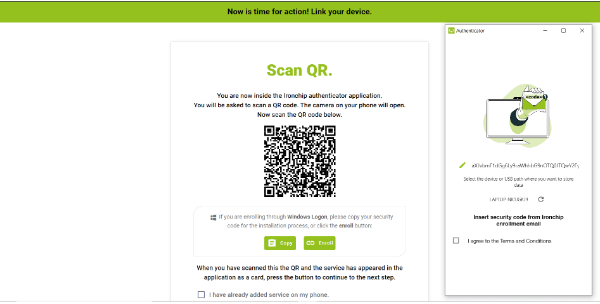
You may choose whether to use biometrics in the application. The use of biometrics in an application involves identifying and verifying the identity of users through unique physical or behavioral characteristics. This can improve the security and convenience of the user experience.The QR displayed on the computer screen will be scanned with the Ironchip application.
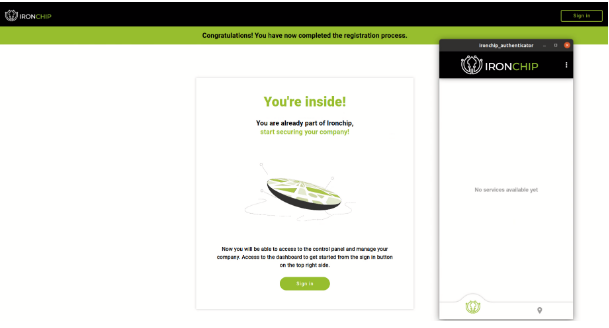
With this, the registration process will be finished, you will know when the following image appears on the computer and the application has opened on the cell phone.
Registration via USB
This option allows you to take your identification credentials with you wherever you go. Once you have registered using an external memory device, you can use it as an authentication mechanism on any Ironchip-compatible device with Ironchip Desktop Services installed.
To register a new device as an identity provider for yourself, you will need to select the device to install on during the registration process when running the Ironchip Desktop Application:
- Insert your external storage device.
- Press the Refresh button to scan your external device..
- Click on the device name to the left of the refresh button and choose the desired external device from the drop-down list..
The external device must remain connected to be able to use the desktop application.
The administrator will have sent you an enrollment email and you should copy the code received in the email and paste it into the window.
And you would already be discharged.
Registration via desktop
To register through a desktop, an Administrator will have registered you on the platform through the control panel, "Management Panel". At that moment you will receive an email to verify yourself and the following steps will be followed:
In the email you will click on the "Verify my email" button.
The desktop application will be downloaded; therefore, you must click on "Continue".
The security code displayed on the computer screen will be copied and entered into the Ironchip desktop application.
With this the registration process will be finished, you will know when the following image appears on the computer and the application has opened.
Authentication Process
The authentication process can be performed in two different ways:
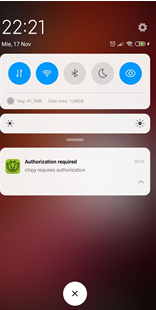
- To start the process, you will have to enter your credentials in the service you want to authenticate. When doing so, a push notification will be sent to the cell phone through the Ironchip application.
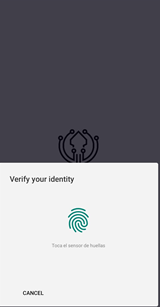
- Clicking on the "push" notification will open the Ironchip application, in which we will need to enter the selected biometrics if it was first set as a requirement.
- Once inside, clicking on "Authorize" will open the signal scanning screen that will verify if you are in the authorized location for service access or not. If you are in the correct location, you will have accessed your service.
The second way in which this process can be carried out is as simple as the previous one:
To start with the process, you will have to enter the credentials in the service in which you want to authenticate. When you do so, a push notification will be sent to your cell phone via the Ironchip application.
Now, instead of clicking on the push notification, you can access the application directly in the Services section. In this section on the service where the credentials have been entered, you will see a countdown timer. This countdown timer shows how many seconds are left to perform the signal scan to verify your identity. Click on the card.
Once inside, clicking on "Authorize" will open the signal scanning screen that will verify if you are in the authorized location for service access or not. If you are in the correct location, you will have accessed your service.
Recovery process
To proceed with the account recovery process, you must first contact your administrator. Once you have completed this step, you will receive an "account recovery" email.
Within this email, you must click on "Recover my access".
Once you have clicked the button, this window will appear, which you will use to scan the qr code with your cell phone:
Once you have given all the permissions requested by the app, you must accept the terms and conditions and scan the QR code provided.
And you would have your account access restored.
Generation of safe zones
How to create a safe zone?
In the secure zones tab you will find all the keys that you can operate with if your administrator so decides. Among them you will find the keys created by yourself and those shared with you.
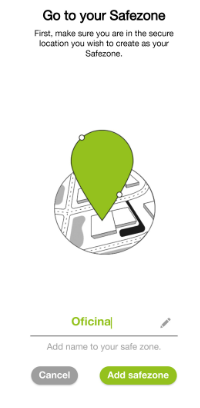
To create a new secure zone, follow the steps below:
Click on the icon "+".
Insert a name for your safe zone.
Click on "Add safe zone".
When the progress zone comes to an end, your safe zone will be created correctly
Windows Log On
By means of the authentication process through Windows Logon you will be able to access your Windows services in a secure way using additional security factors to your usual password, through push notification, Offline or USB.
With the Push notification you will receive a notification to your cell phone to authorize the login.
With the Offline function, you will be able to access the device without the internet using a code provided to you.
With the USB function, you will be able to access the device without having to authorize anything, as the USB is self-authorized.
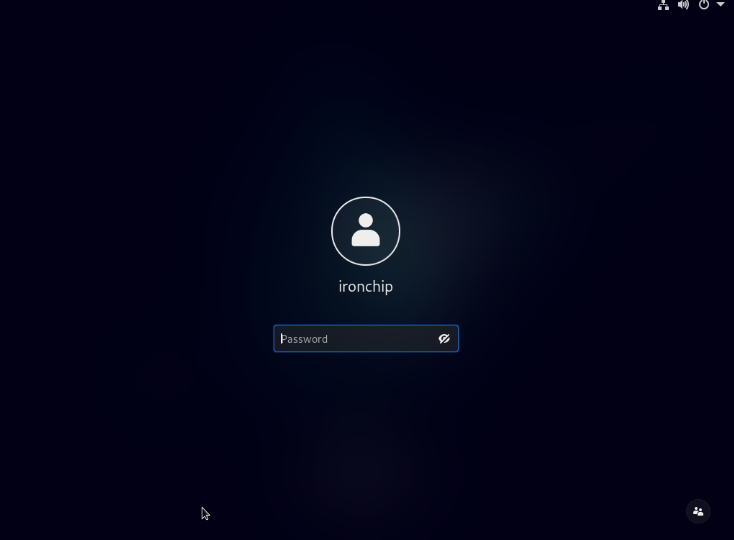
The first drop-down list, in case you have more than one user, is used to choose the user with which you want to log in to the computer.
You must fill in the required fields such as user and password.
With Push notification
Once you have entered your login information, you will receive a notification on your cell phone asking you to authorize the login.
With USB
You must have previously registered using a USB to be able to access using this mechanism.
You must fill in the required fields such as username and password.
As you have the pendrive inserted in the device, there would be no need to authorize anything, it would be done through the USB automatically.
OFFLINE
1. Access our offline authenticator application, through which you will be provided with a link. Through this link you have the possibility to create one of your offline keys.
If you do not clearly remember the user with which you log in, you can ask your administrator for help.
2. Once the offline key has been generated, a qr code will appear to add it to the mobile app and a text code to copy and paste into the desktop app.
3. To scan or add the code, you must go to the second tab at the bottom right, the one with the padlock icon, and then click on the round green button (+) that appears in the bottom right corner, and click on Scan a QR code.
Scan the generated QR code or manually enter the Setup KEY, if everything goes as expected a new entry will appear with your OTP code, which is regenerated every 30 seconds.
Once added, if you click on the card that has appeared, it will display the OTP code, which will be hidden every 30 seconds.
Here you must enter the code that has been provided to you previously.
In case you get the error that OTP is not installed, there are two possible solutions:
- You can connect to the internet and log in via push notification or via USB.
- In case you do not have internet you should contact your administrator.
Password change
To change your password, you must contact the administrator, once contacted, you will see this window when you want to log in or if your password has expired you will also see this window:
Then, you will have to fill in the second field with the user you want to access, the third one with the previous password and fields four and five, you would have to fill in with the new password.
Once it is changed you will see the following message:
Linux Log On
Using the authentication process through Linux Logon you will be able to access your Linux services in a secure way. Within this, according to the administrator's requirements, you can ask for authorization at login, when you want to escalate privileges within Linux (sudo) and/or when you want to use the ssh service.
Once the administrator has installed Linux log on to your computer, log in and a push notification will be sent to your cell phone.
Web services
Ironchip's platform allows access to the company's services through the browser. Within this, there are two possible ways to access, SAML or OIDC.
With the first possibility you will see a tab like the one below and you will have to access it by clicking on "Login with Ironchip".

You must access by clicking on the red button, enter your usual email address and click on send notification. Then you will receive a Push Notification from our application


You must accept the notification from our application by clicking "Authorize" and you would already have access to the platform.
The second option in which we can find this type of login is similar to the one shown below.

You must click on the gray rectangular button at the bottom, "Ironchip Authentication". This same button may also appear as "Sign in with OIDC". Clicking it will open an additional tab.
In this new additional tab, you will be able to authenticate with your usual email address through our authenticator application. Finally, you must click on "Send notification" to receive the push notification.

You will then receive this notification on your cell phone, which you must accept in order to access the platform.

FAQ’s
How do I contact IRONCHIP support?
We are easy to find! You can find us in several places:
⦁ In the contact section of our website
⦁ By phone 946 03 94 99
⦁ In the web chat
⦁ At ⦁ info@ironchip.comWhy don´t we keep the signature in safe places?
For more security and because it is not necessary. At IRONCHIP we believe that not storing them will prevent the large-scale credential theft that we might experience in the future. Also, biometric solutions, although convenient, are not a very good approach to security since, if stolen, no user will be able to change them.
That is why we only maintain a mathematical model that is the solution to learn the set of signals. Once learned, the signals are erased.
Can I integrate?
IRONCHIP uses the most widely used security standards such as SAML or OIDC (OpenId-Connect) to integrate with your systems either in Windows environments (Microsoft Active Directory) or we provide you with the management platform.
On the user side, we have the possibility to use an SDK to integrate it into your applications, or in any case, you can use the official IRONCHIP Location-Based Authentication application.
Common errors
Error in device name
If you have and iOS device and have seen this error:
The device name in iOS cannot contain accents, "-, /, $, $, %, @, &, ., _" or similar characters. Therefore, to fix this error, you must change the device name.
Login Error
If you have seen this error:








-gif.png?width=311&height=637&name=imageedit_42_8731775061%20(1)-gif.png)
