Active Directory
Activating and configuring Active Directory
For the activation and configuration of the active directory you will use the Server Manager in which you will access the Add Roles and Feature section, in this section you will add different roles:
- Active Directory Domain Services
- Active Directory Federation Services
Follow this window by clicking on Next until you reach the end. When this happens, you will see a loading bar. When you have returned to the main Server Manager page you should notice that the 2 previously selected roles have been added to the left menu. In addition, 1 alert will appear in the top menu.
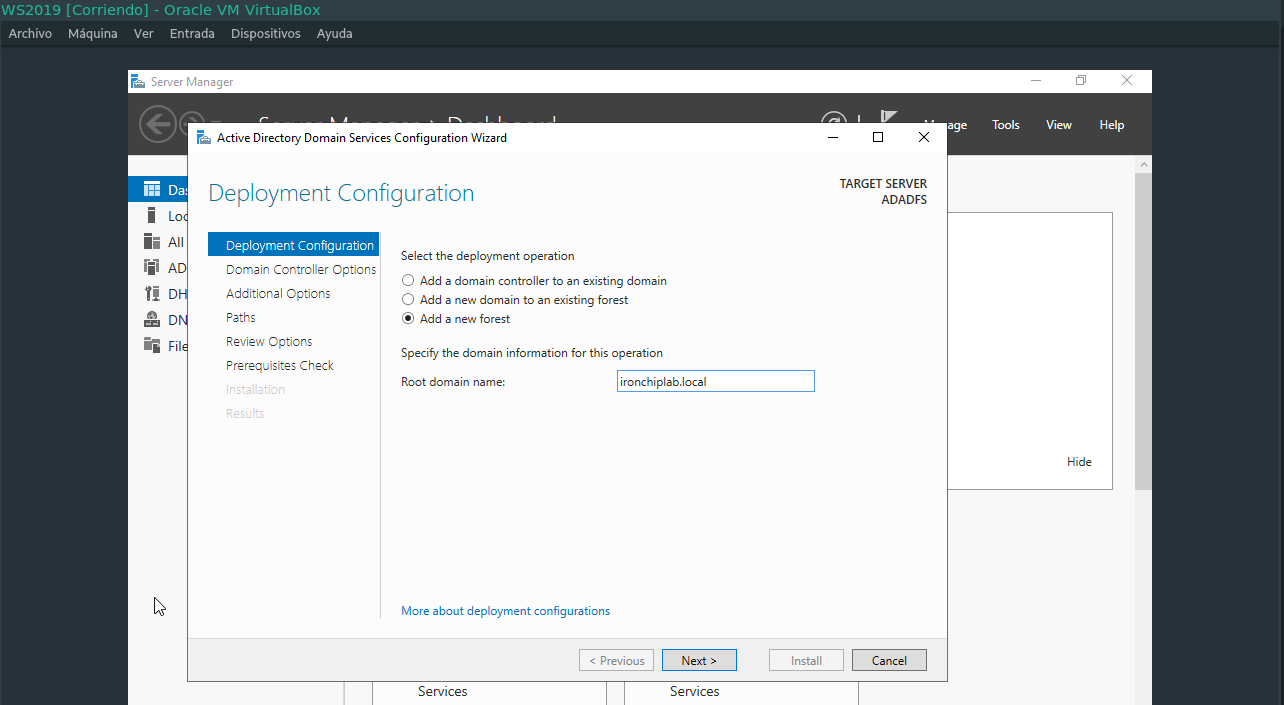
Click on the alert Promote this server to a domain controller. In this open tab select Add a new forest and write the desired domain name. Follow all the steps until you reach the end and click on the Install button. After completing this you will receive another DNS alert which will be resolved later.
DNS
Configuring DNS
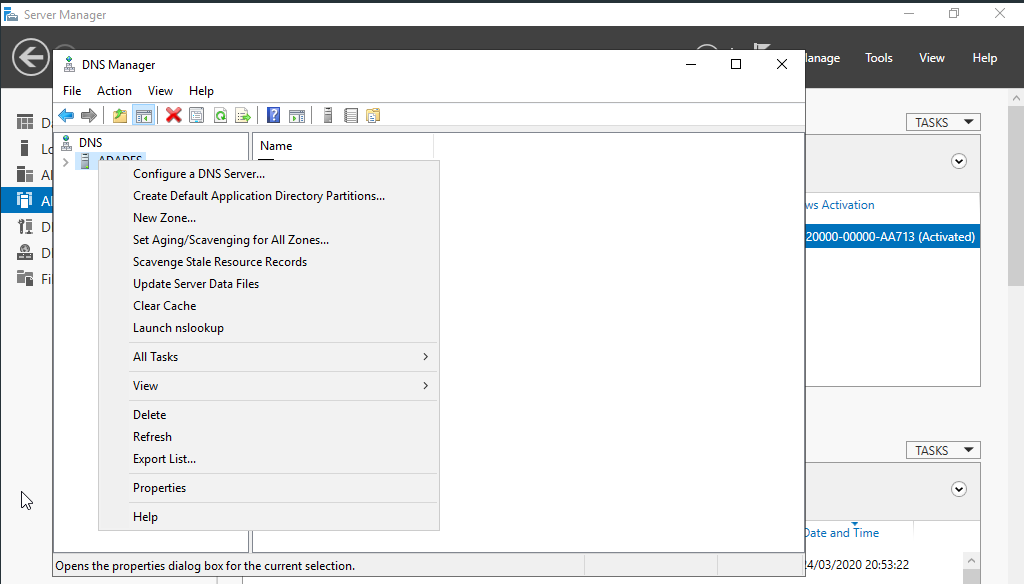
From the administrative tools you will open the program for DNS configuration. Right-click on ADADFS to get to Properties.
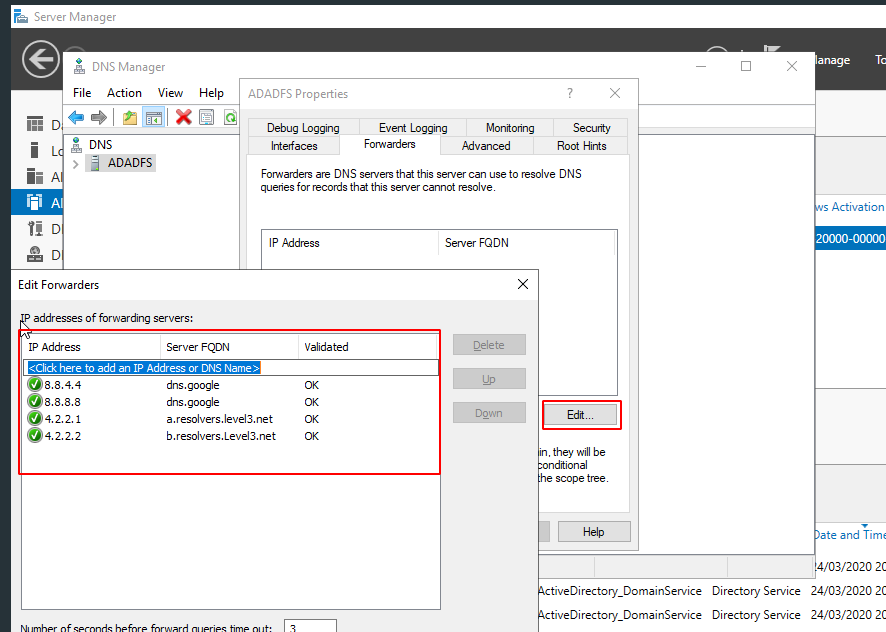
Click on the Forwarders section and add the external DNS servers that are necessary, such as 4.2.2.1, 4.2.2.2.2, 8.8.8.8 and 8.8.4.4.
After this, the machine will restart automatically.
SSL Certificate
SSL Certificate Creation
The certificate will be created using the following command:
New-SelfSignedCertificate -DnsName server.ironchip.localWhen this is created, the program certlm.msc will open. The created certificate is located in the folder named personal. Right click on the certificate and Open, in the tab Details click on Copy to file. In this new window, the only thing you have to change is to export the private key by selecting Yes, export the private key. Try to save the certificate on the desktop and then export it to the corresponding folder.
To export the certificate we will execute the certificate from the desktop, this will open a window. In this window we will have to change 2 things:
- We will choose Local Machine.
- Once you have reached the point of exporting it, click on Place all certificates and in Browse select the folder Trusted Root Certification Authorities.
Note: Everything else will be default.
Active Directory Federation Services
Configuring AD FS
The next step is to set up the federation service.
In the Server Manager control panel, the alert will open and then select Configure the federation service on the server.
The Active Directory Federation Service Configuration Wizard opens.
On the Welcome page, select Create the first federation server in a federation server farm, and then click Next.
On the Connect to AD DS page, specify an account with domain administrator rights for the ironchip.local Active Directory domain that this computer is joined to, and then click Next.
On the Specify Service Properties page, do the following, and then click Next:
- Import the SSL certificate that you have obtained earlier. This certificate is the required service authentication certificate. Select it in dropdown.
- To provide a name for your federation service, type adfs.ironchip.local. This value is the same value that you provided when you enrolled an SSL certificate in Active Directory Certificate Services (AD CS).
- To provide a display name for your federation service, type Ironchip Corporation.
On the Specify Service Account page, select Use an existing domain user account or group Managed Service Account.
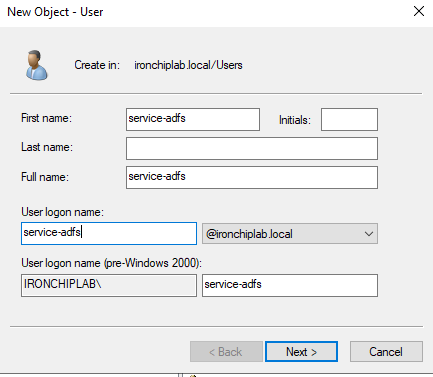
To complete step 5, you need to create an specific user for that service. Go to Step 1 add user if you dont know how to do it. Add a service-adfs user.
After that, you can go back to the wizard, and select that user
On the Specify Configuration Database page, select Create a database on this server using Windows Internal Database, and then click Next.
On the Review Options page, verify your configuration selections, and then click Next.
On the Pre-requisite Checks page, verify that all prerequisite checks were successfully completed, and then click Configure.
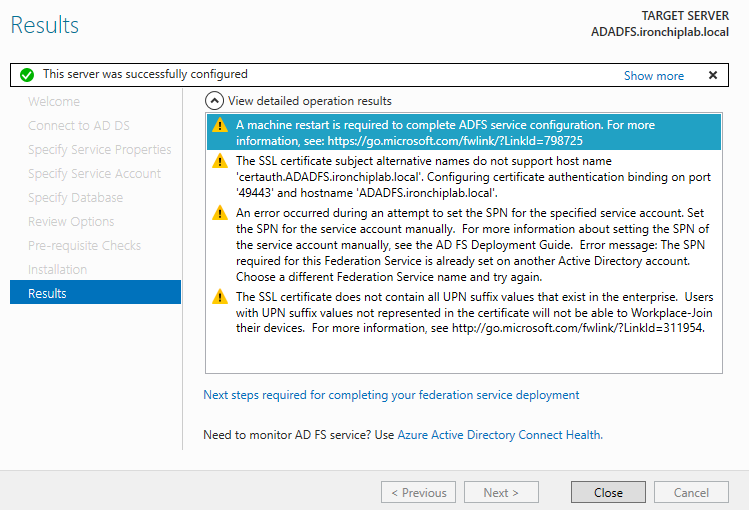
On the Results page, review the results, check whether the configuration has completed successfully, 4 warnings will prompt, but dont worry about that at now.
Application
Creating an ApiKey Application
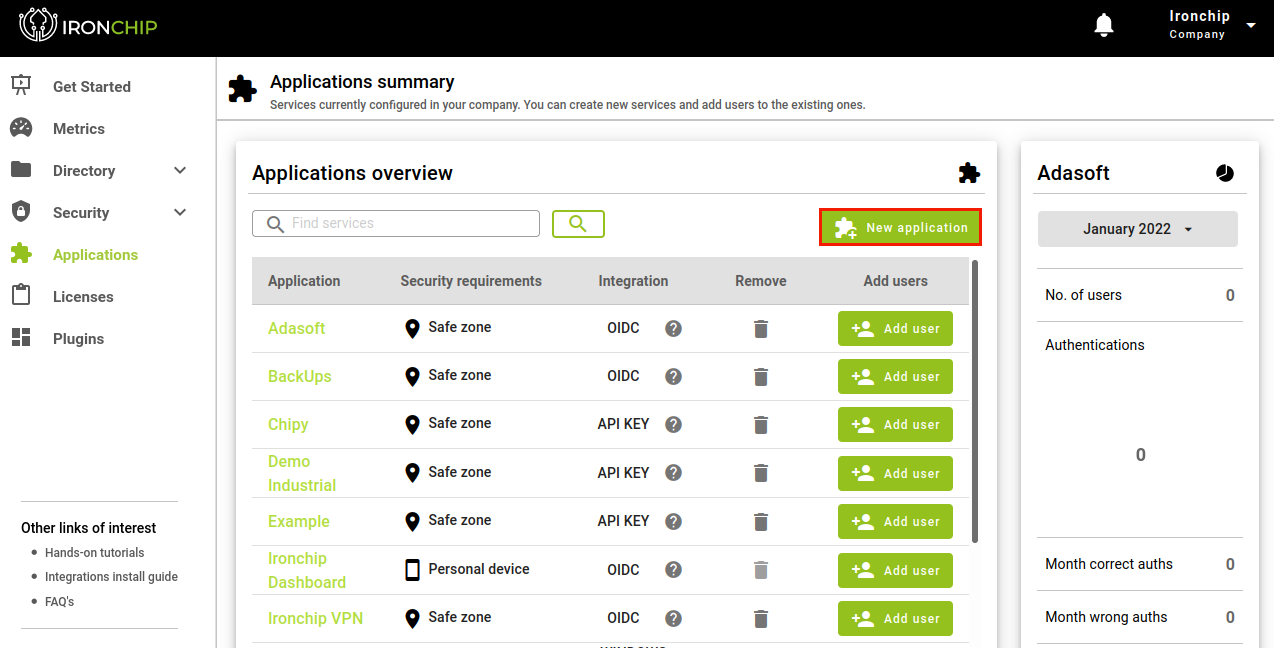
Once you access the Ironchip platform you will have to navigate to Applications and create a new one.
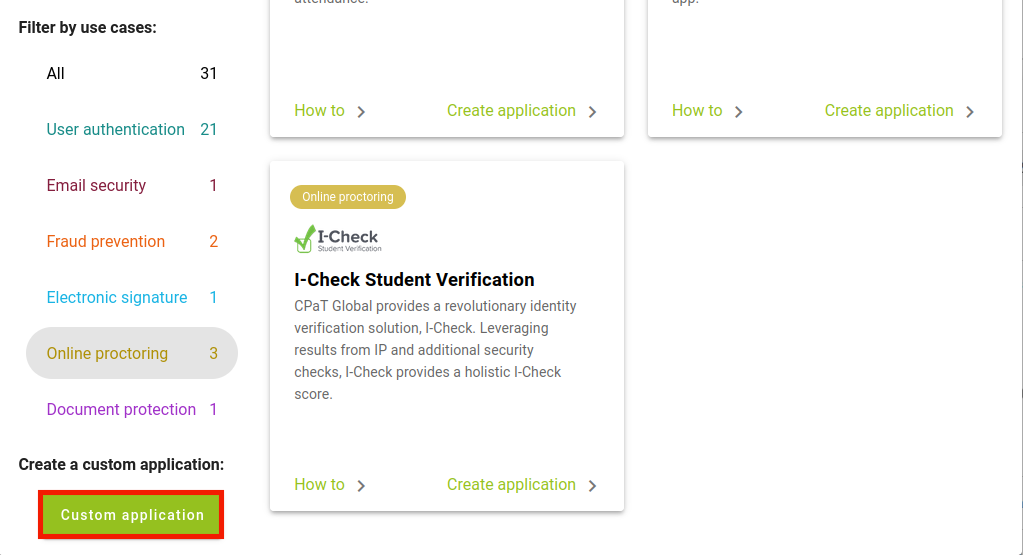
In this case the type shall be Custom, for which Custom application shall be selected.
In the opened window, the necessary information regarding the service being created shall be added.
You will receive a new ApiKey, this should be saved for use in the next step.
Note: You will not be able to retrieve this information once the tab is closed, so copy and save it.
ADFS Plugin
Installing AD FS Plugin
To install the plugin, you need the plugin installer, which can be downloaded from the Ironchip Dashboard’s plugin section:
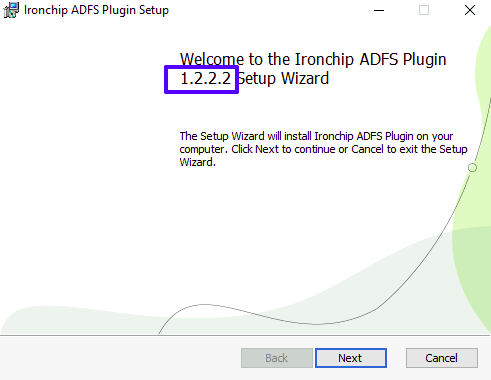
Once downloaded execute the installation file and proceed through the installation process:
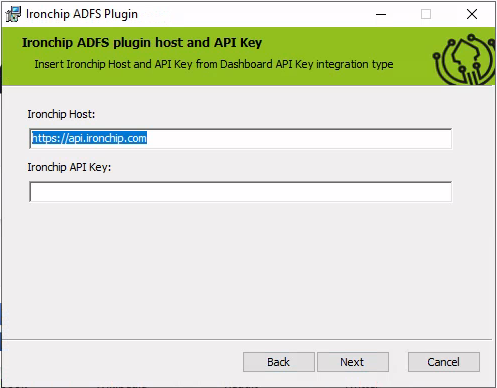
the only fields to configure are, the service host, leave the default in case of doubt, and the API Key generated when creating a new API Key service, please check this manual on how to generate the associated API Key service:
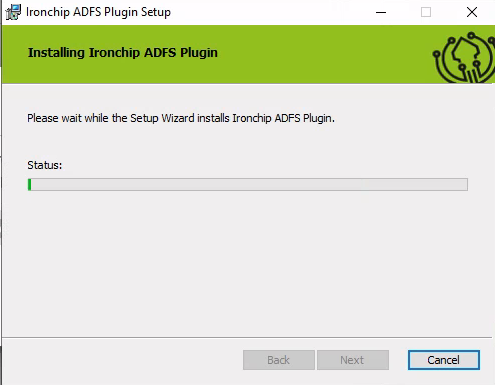
If configured correctly, the installer will add the plugin to AD FS and then restart the AD FS service to consolidate the changes:
Testing ADFS Plugin
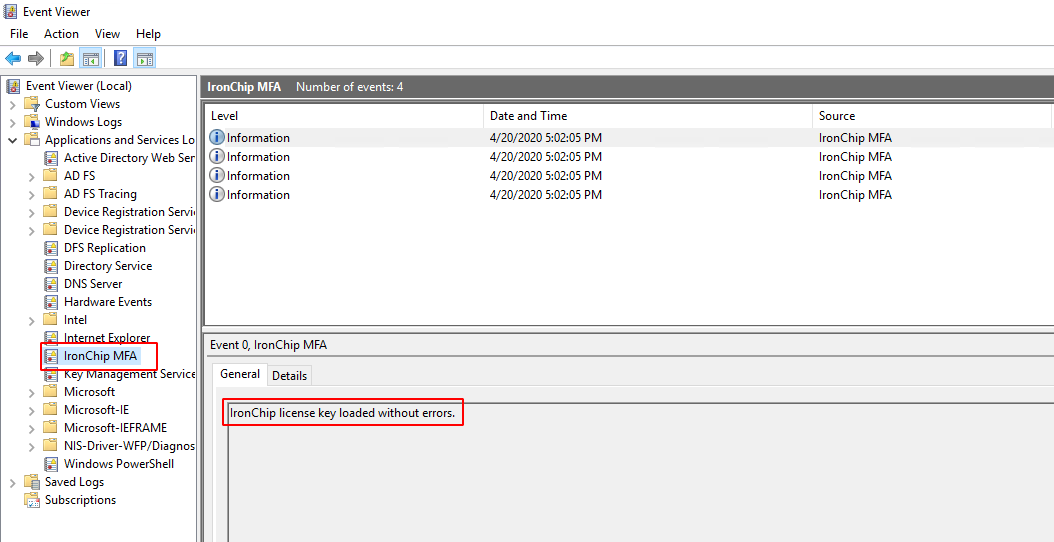
Access Event Viewer to see IronChip MFA Plugin logs.
If everything is OK, you must see “IronChip ADFS Plugin” in Application and Services Logs list. Click on it, and if plugin is installed you must see “IronChip license key loaded without errors.” in logs as you can see here:
Note: If you see the message “Unable to load IronChip license key”. Check that it is the correct license and try again. If problem persist contact IronChip support for help.
Claims Xray
Configuring Claims Xray as test AD FS Application
Navigate to https://adfshelp.microsoft.com/ClaimsXray/TokenRequest and follow instructions.
Execute PowerShell as Administrator and run:
$authzRules = "=>issue(Type = `"http://schemas.microsoft.com/authorization/claims/permit`", Value = `"true`"); "
$issuanceRules = "@RuleName = `"Issue all claims`"`nx:[]=>issue(claim = x); "
$redirectUrl = "https://adfshelp.microsoft.com/ClaimsXray/TokenResponse"
$samlEndpoint = New-AdfsSamlEndpoint -Binding POST -Protocol SAMLAssertionConsumer -Uri $redirectUrl

Add-ADFSRelyingPartyTrust -Name "ClaimsXray" -Identifier "urn:microsoft:adfs:claimsxray" -IssuanceAuthorizationRules $authzRules -IssuanceTransformRules $issuanceRules -WSFedEndpoint $redirectUrl -SamlEndpoint $samlEndpoint
This adds claims xray as RelyingPartyTrust.
If you want to add OIDC integration execute:
Add-AdfsClient -Name "ClaimsXrayClient" -ClientId "claimsxrayclient" -RedirectUri https://adfshelp.microsoft.com/ClaimsXray/TokenResponse

if ([System.Environment]::OSVersion.Version.major -gt 6) { Grant-AdfsApplicationPermission -ServerRoleIdentifier urn:microsoft:adfs:claimsxray -AllowAllRegisteredClients -ScopeNames "openid","profile" }
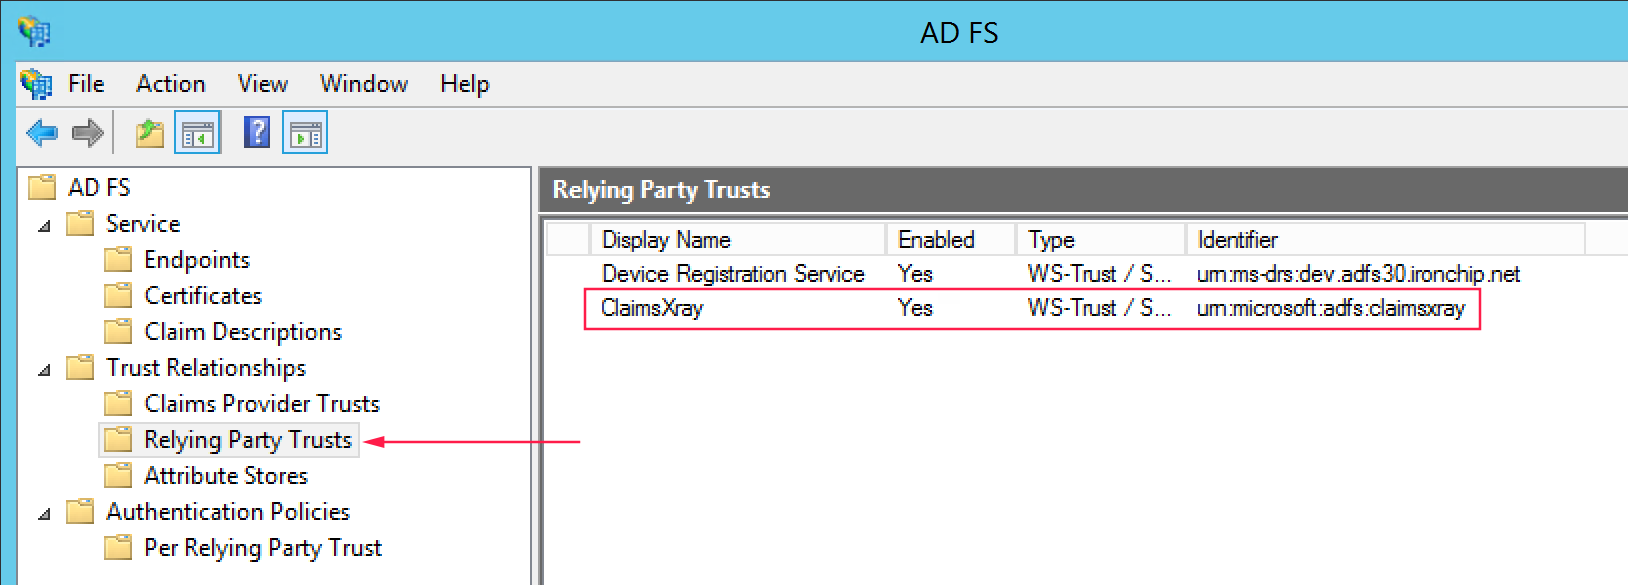
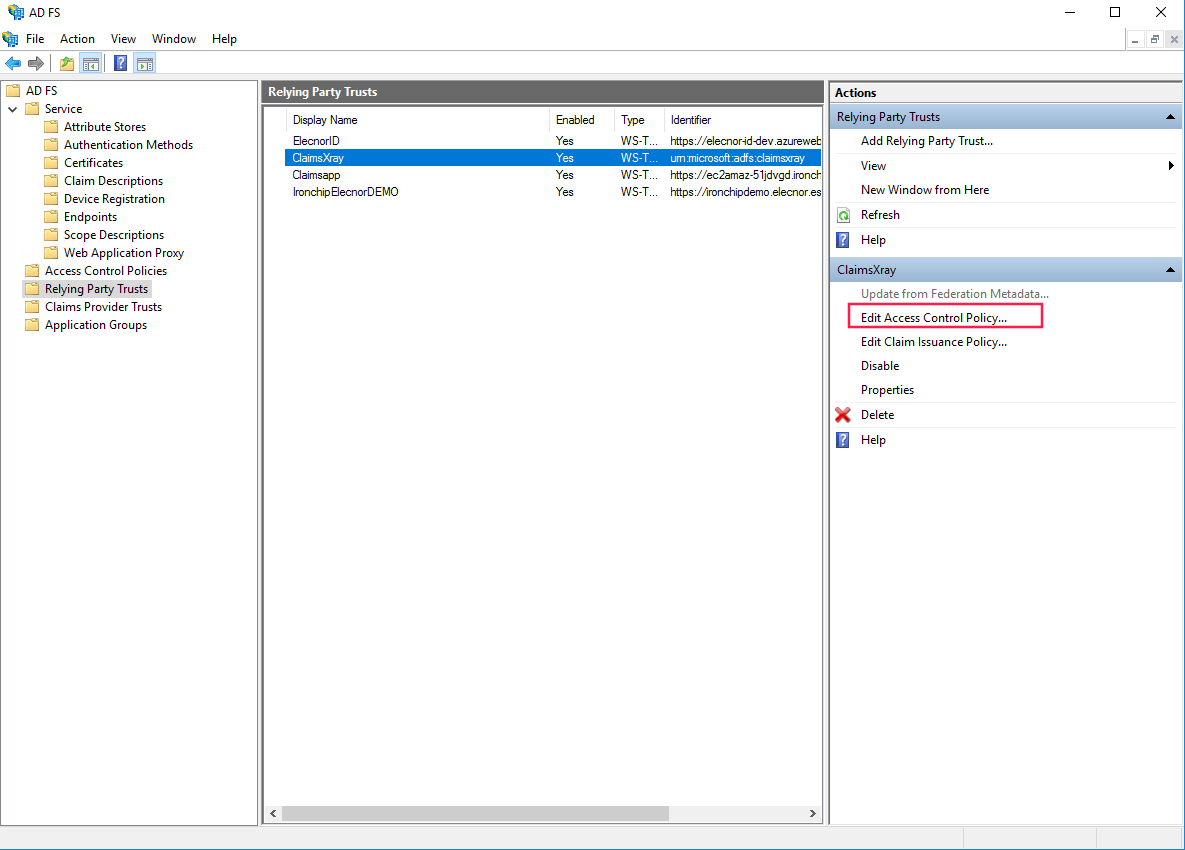
Now we should see Claims Xray as Relying Party Trusts.
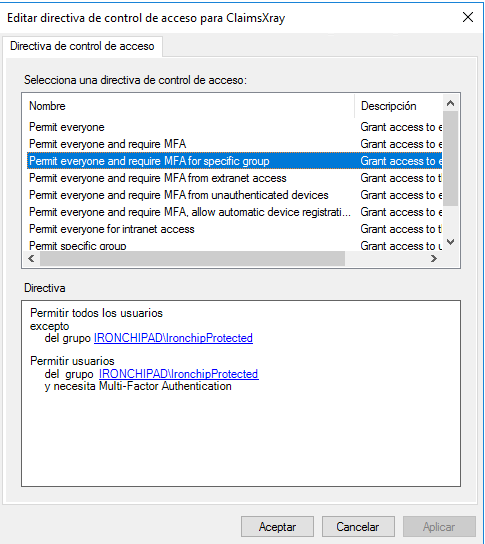
If in access control directory you don’t have any parameter, you should press the right button and click on edit access control directory and delete all. After that you should delete all and the select the third one, permit everyone and MFA for specific group, in the lower part you should select the protected group.
Inside authentication methods in multifactor authentication methods you have to see IronchipMFAAdapter. If you can’t see it you have to edit and add it.
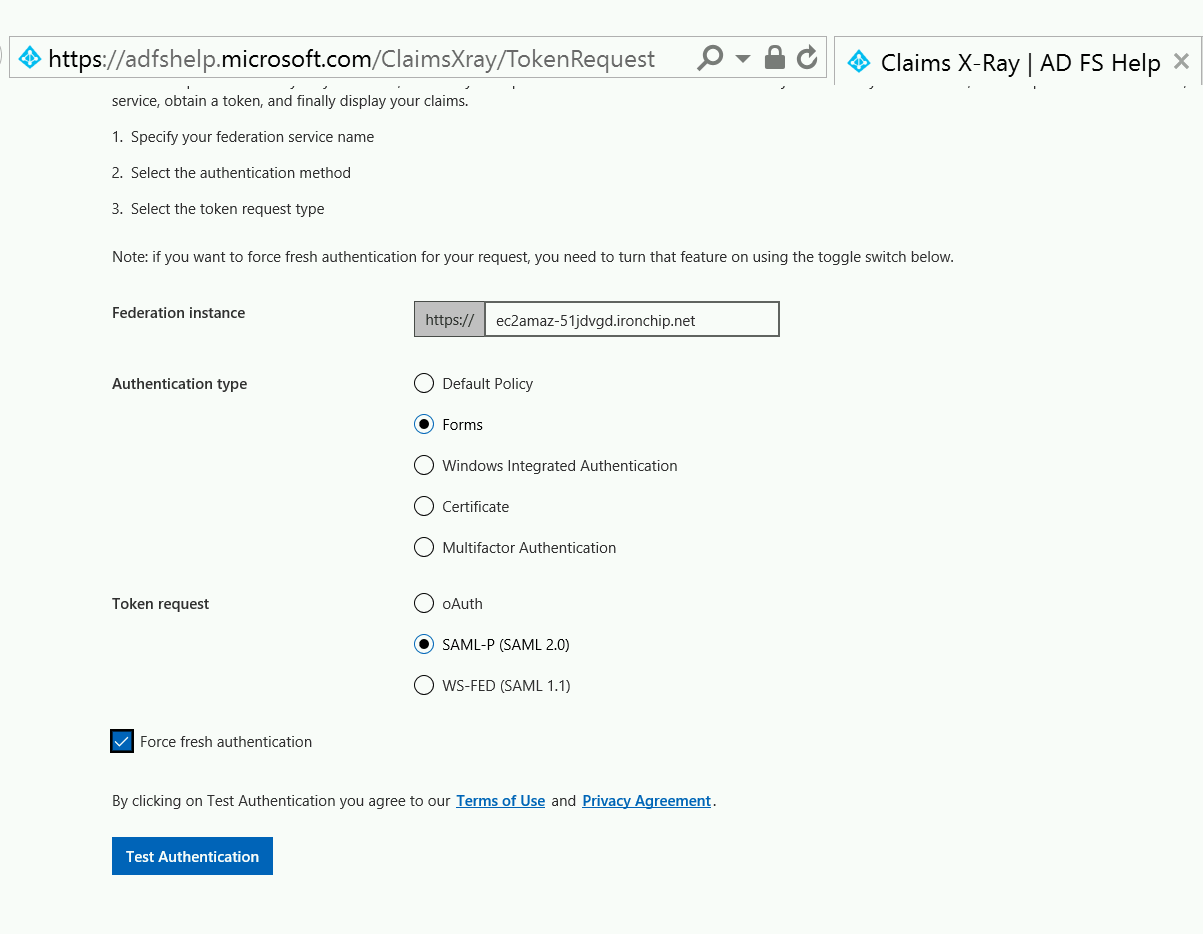
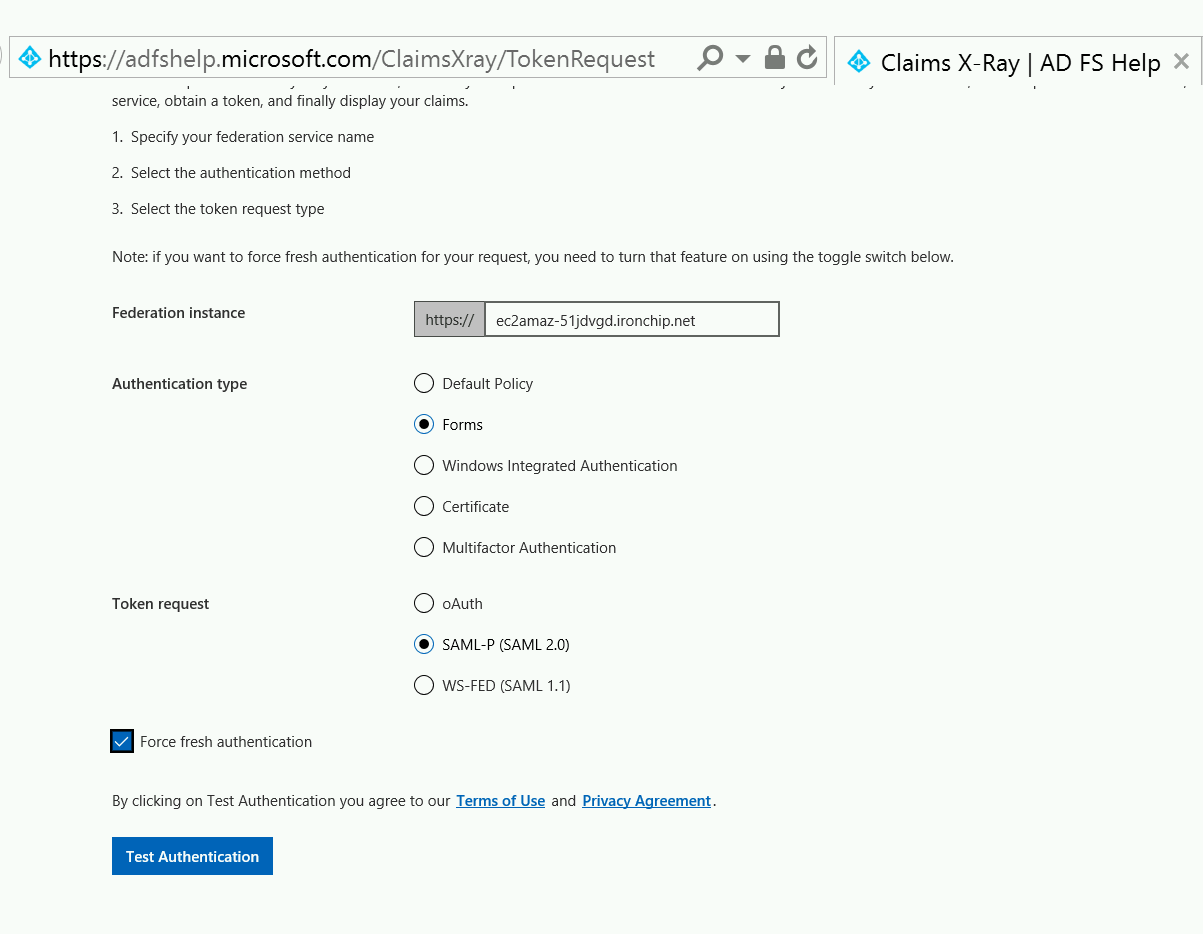
You can use the tool to test AD FS. After that, yo, configure it as you can see in next image:
When you click on Test Authentication, you will be redirected to your ADFS.
IDP Access
IDP login activation
We can see the endpoints of our ADFS from PowerShell
Get-AdfsEndpoint | select FullUrlTest the adfs signup page with the url for your ADFS and add at the end /idpinitiatedsignon.aspx.
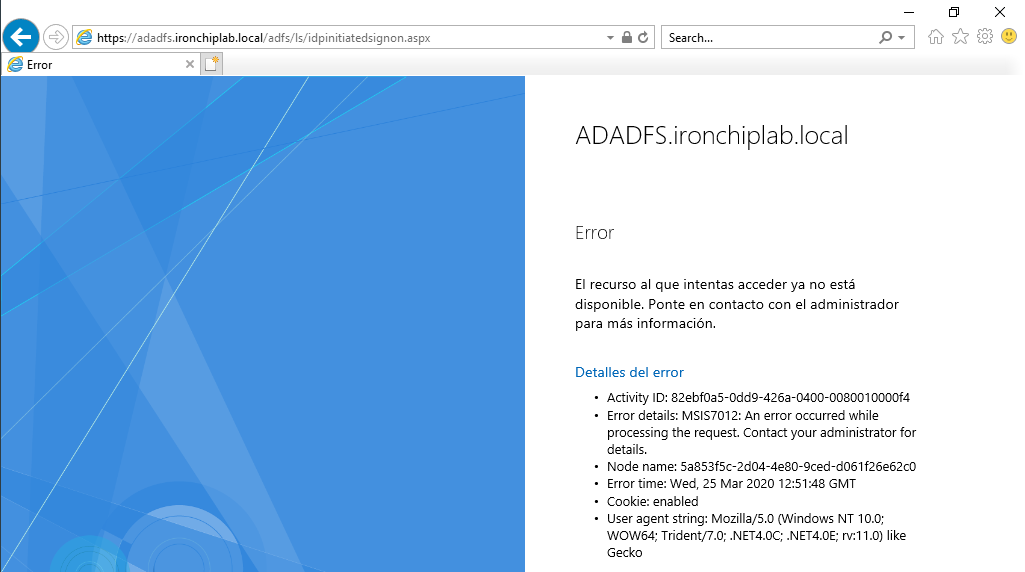
When you go to the page in our browser, you will see an error, because the webpage is disabled by default.
Go to powershell and execute:
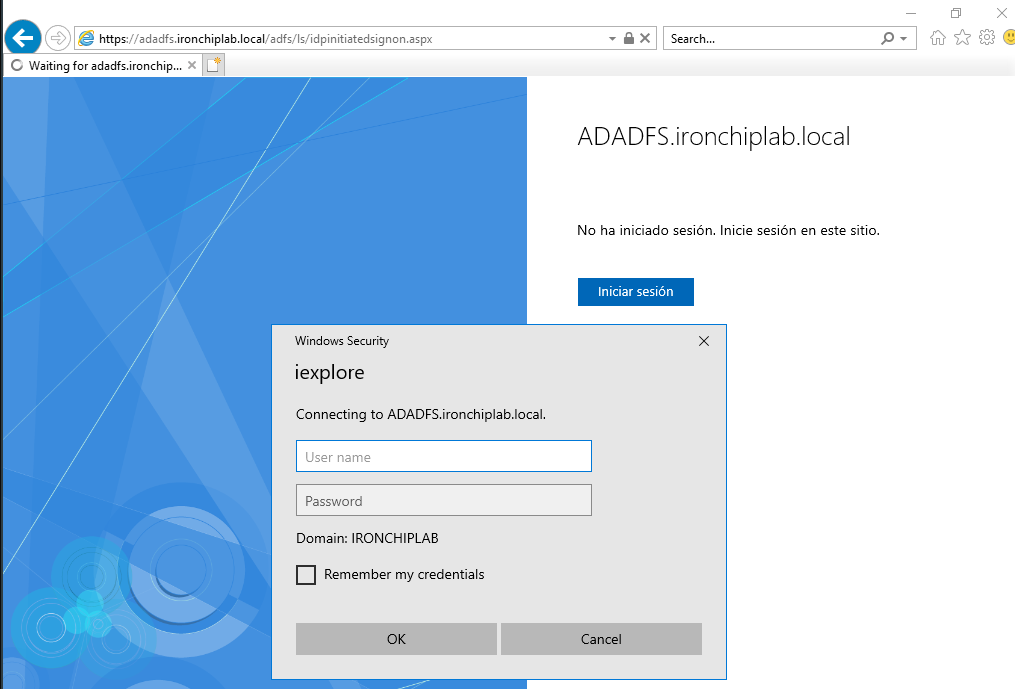
Set-AdfsProperties -EnableIdPInitiatedSignonPage $trueNow you can authenticate with your user:
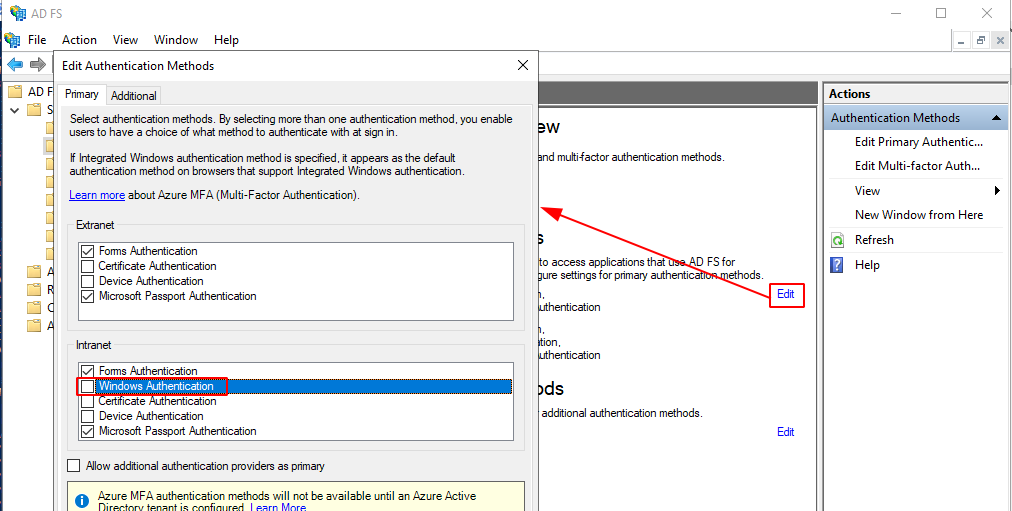
As you can see, windows security prompt apears on screen. You can change this disabling windows security prompt option in ADFS Managment console. Expand services, click on authentication methods, click on Edit in primary authentication methods and uncheck widows prompt option. Click Apply and Ok.
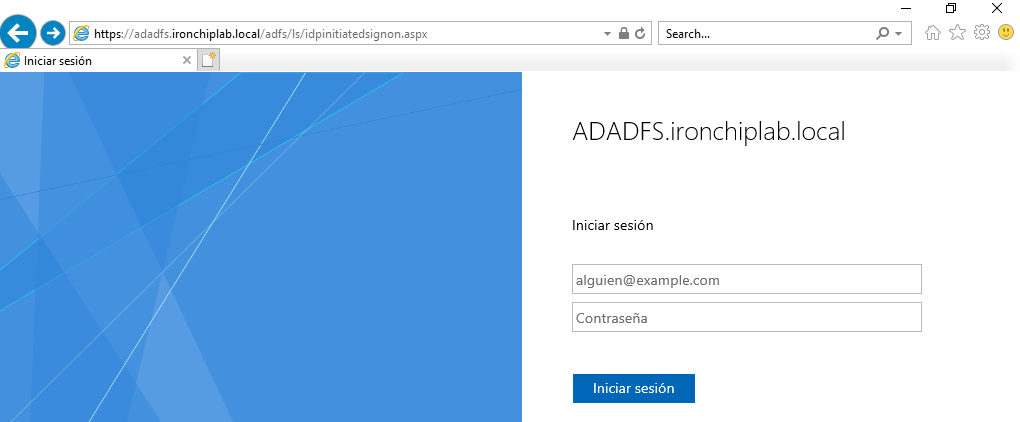
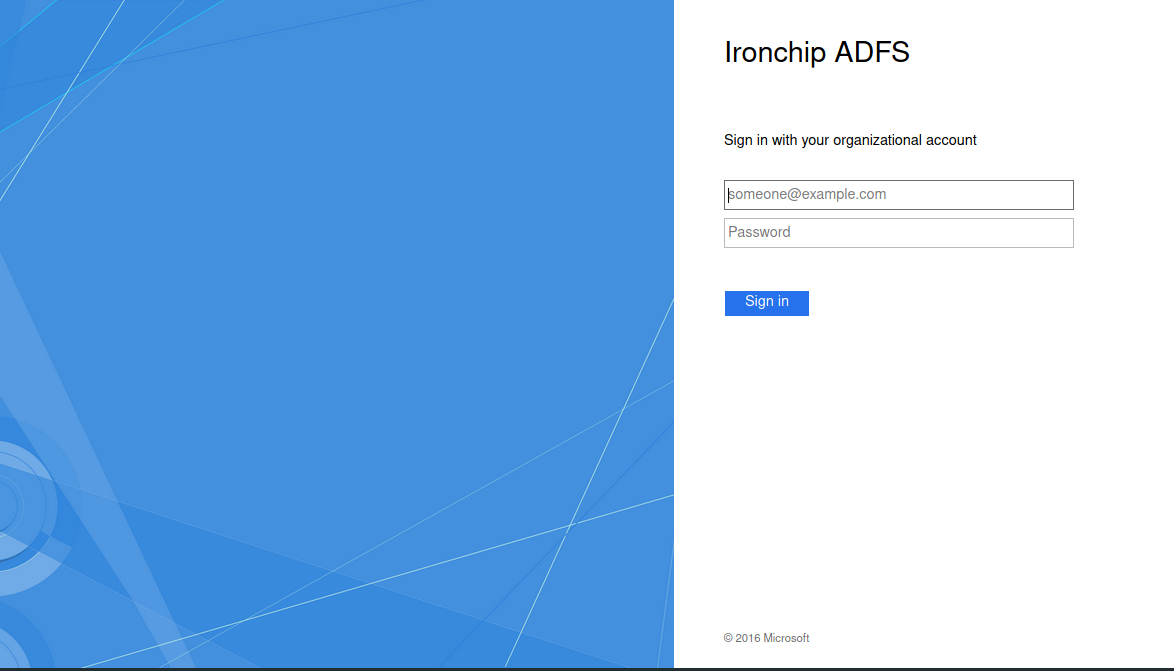
Now you can see a form login.
Ironchip MFA
Configure Ironchip MFA for Relying Party Trusts
Depending on the interface of the ADFS administrator program, a distinction will be made between ADFS 3.0 and 4.0. Choose the appropriate one and follow the instructions.
ADFS 3.0
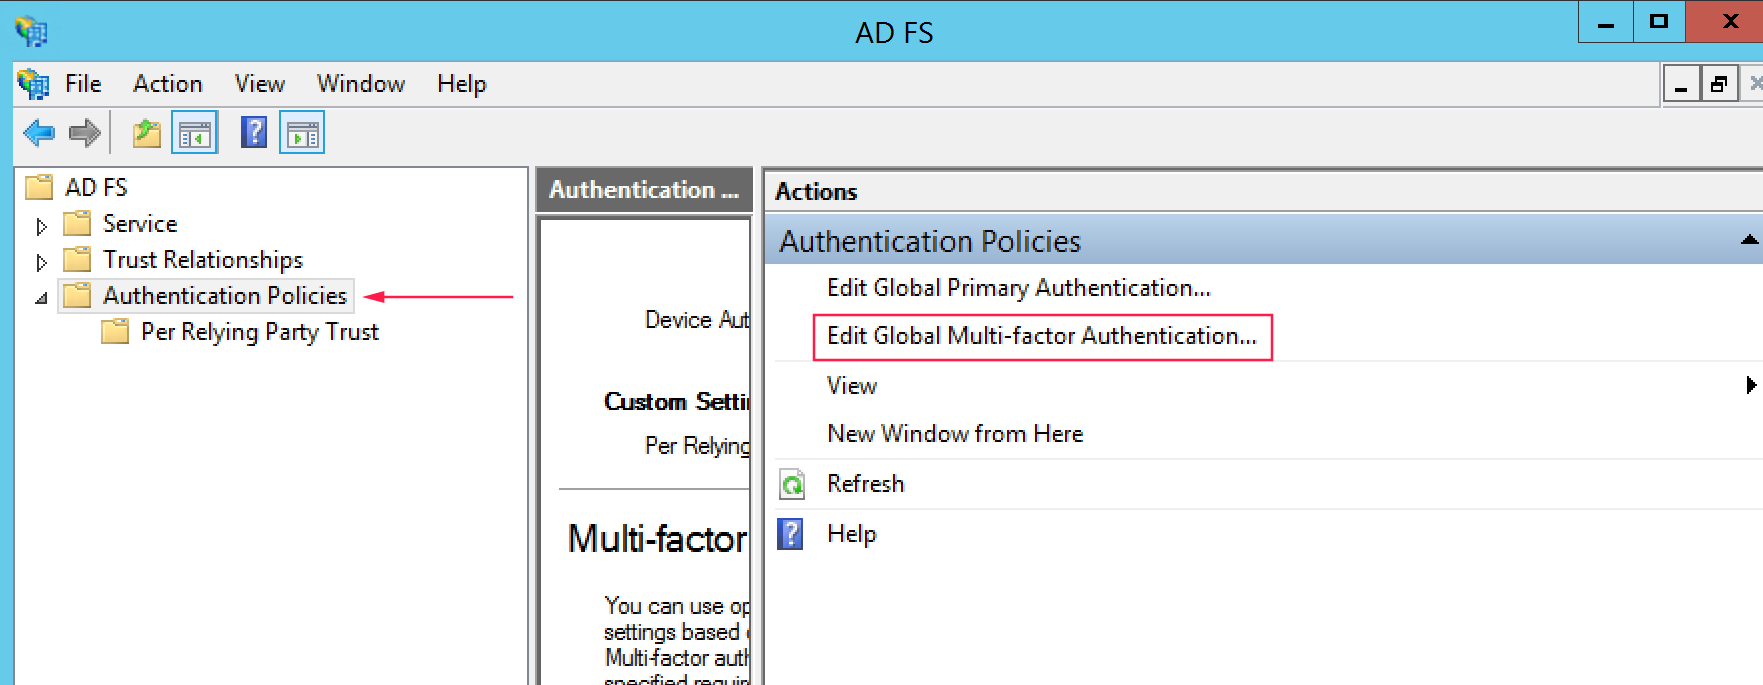
Go to Authentication Policies and click on Edit Global MFA.
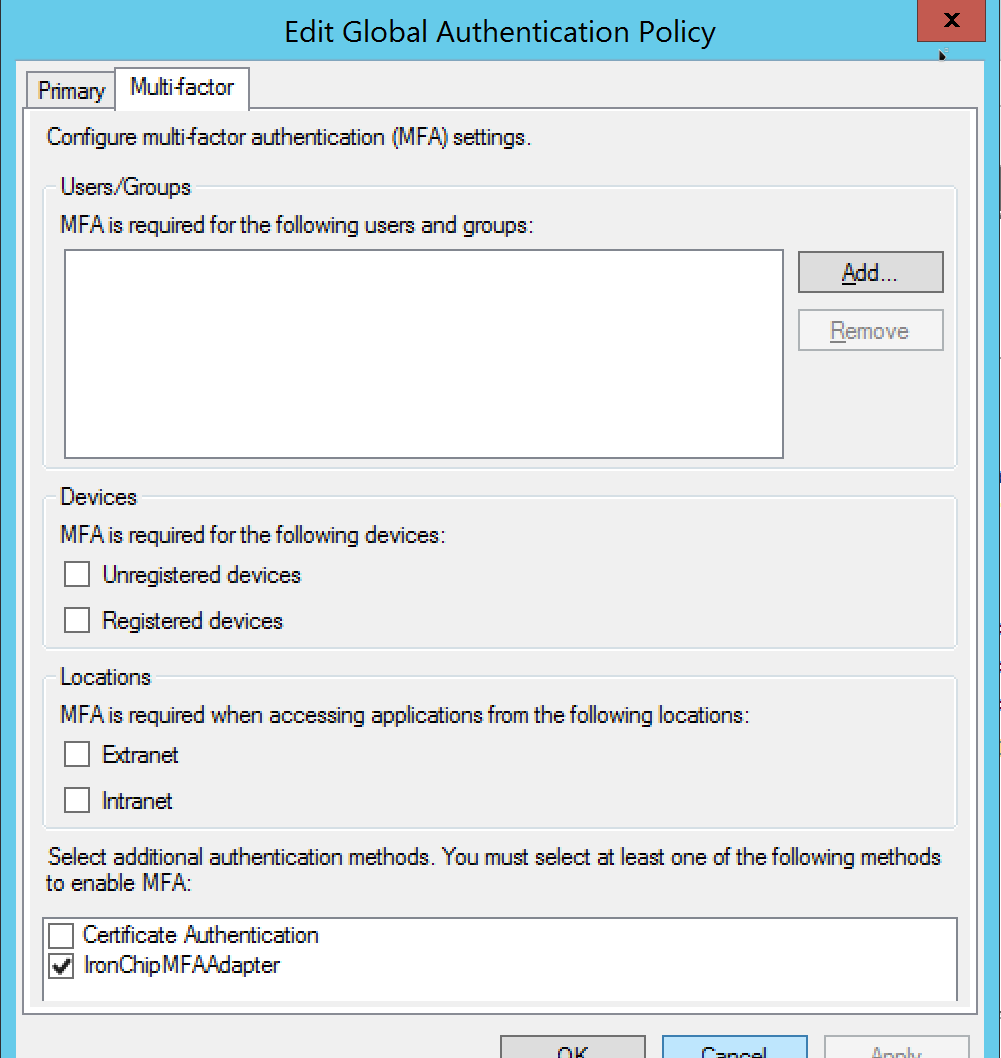
Here select Ironchip MFA Adapter as desired Multi Factor Authentication Method.
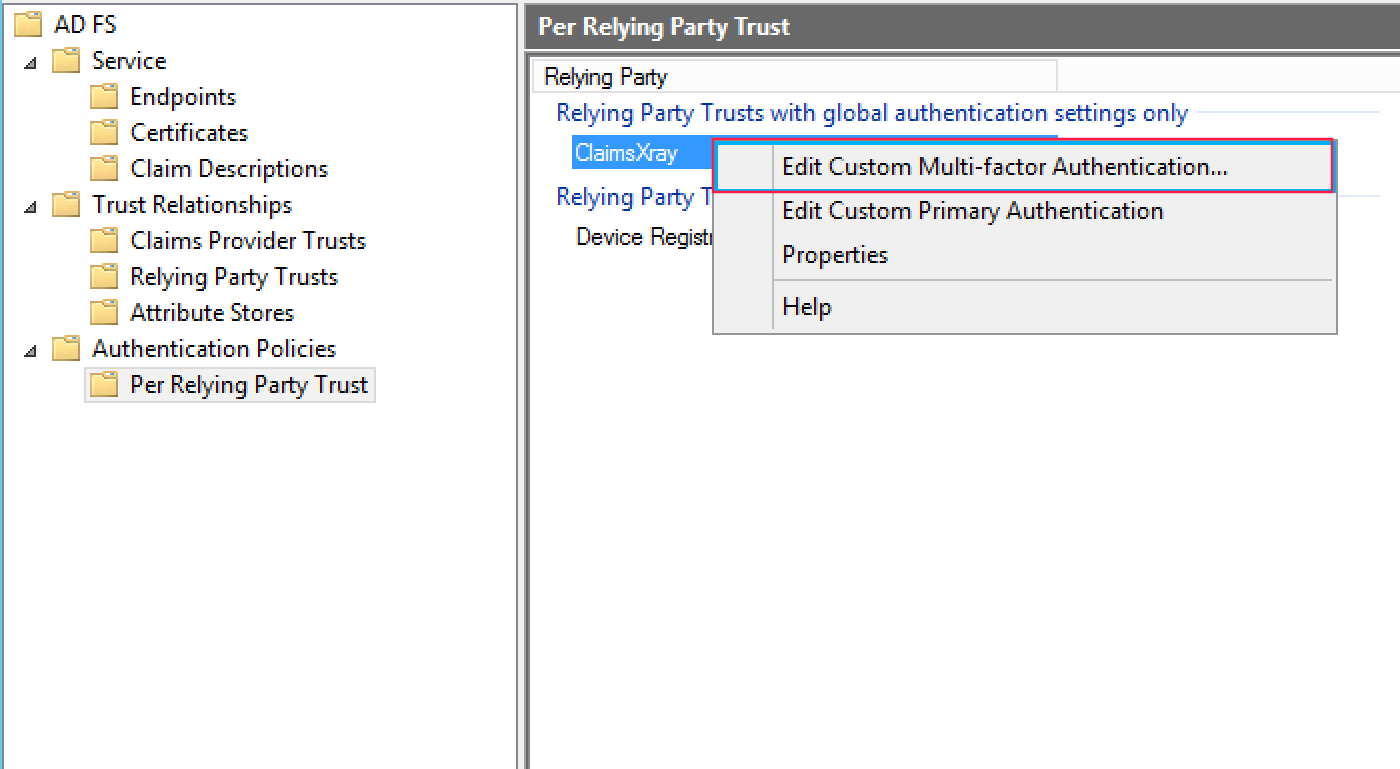
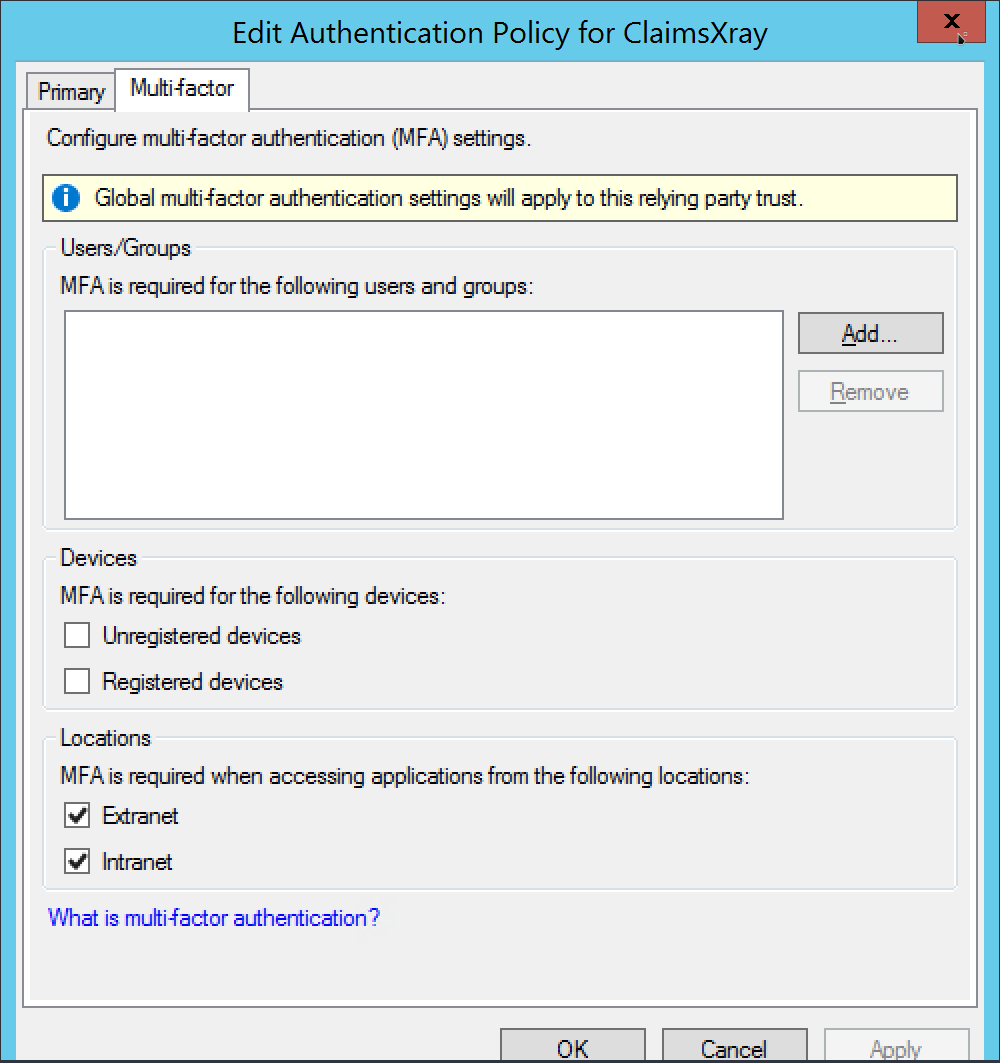
After that, we must enable the Multi Factor Authentication for an specific service, in this example we will require MFA for ClaimsXRay access. Go to Per Relying Party Trust and right click on service to protect. Click on Edit Custom Multi-factor Authentication.
Enable MFA for intranet, extranet or both.
Your service is now protected with Ironchip MFA.
ADFS 4.0
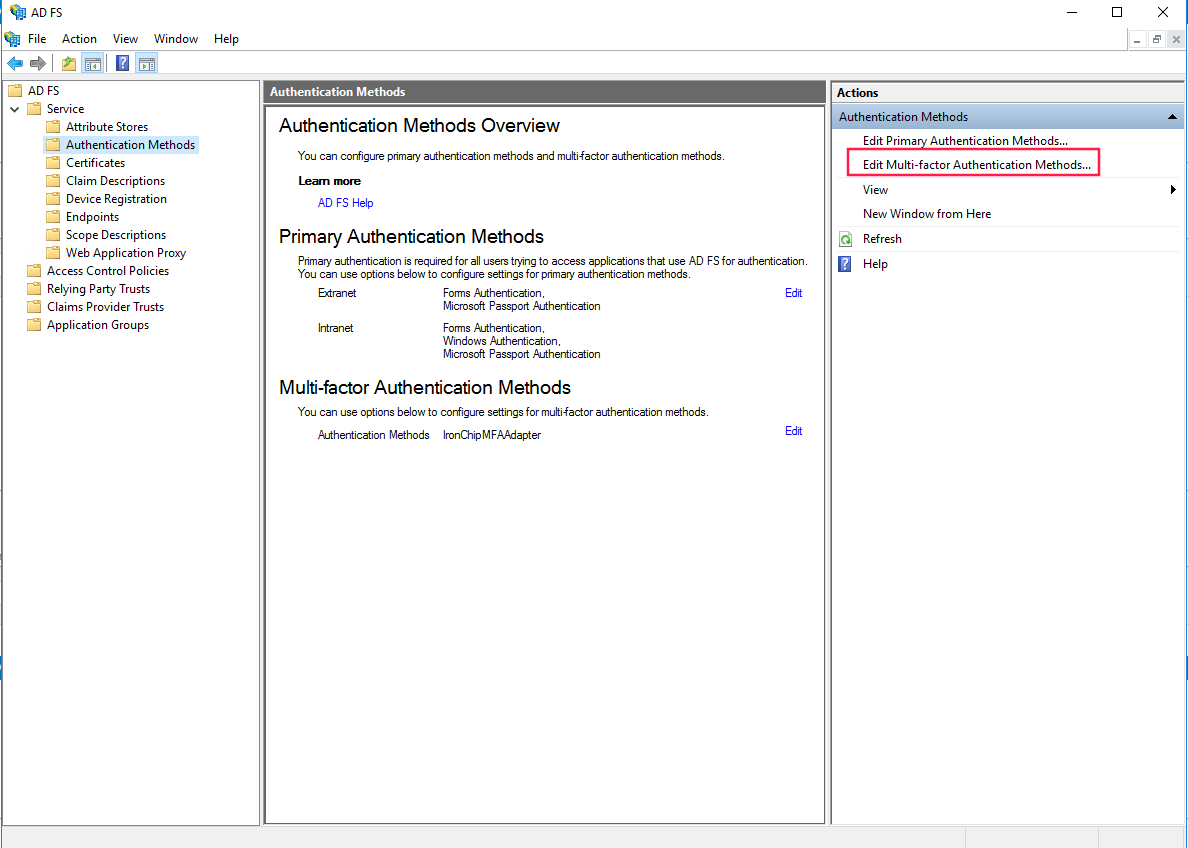
Go to Service > Authentication Methods. Here go to the right menu and click over Edit Multi-Factor Authentication Methods.
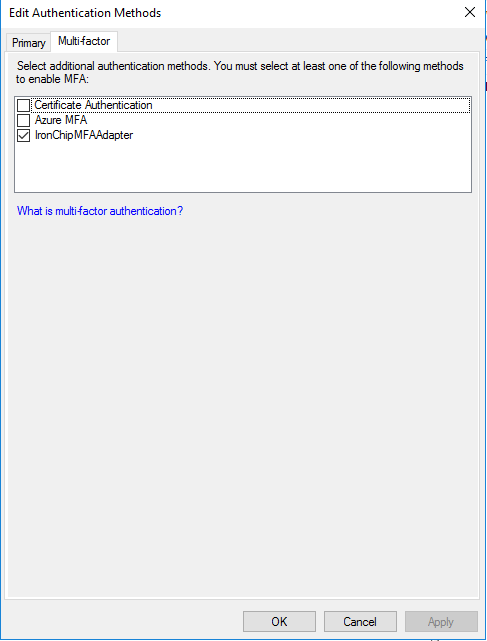
In Multi-factor tab, select Ironchip MFA Adapter.
Apply and Ok. After that, go to Relying Party Trusts and select ClaimsXray service. On right menu, click over Edit Access Control Policy.
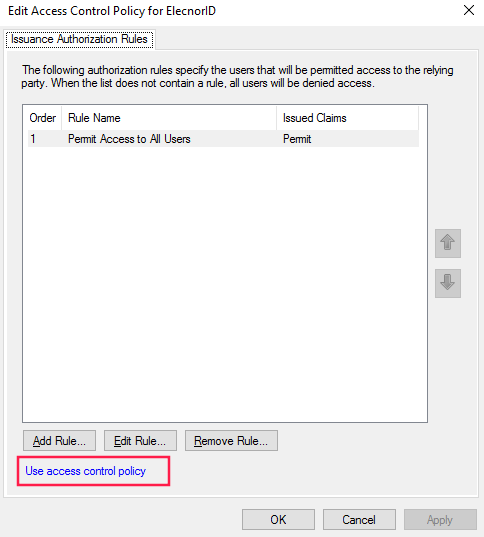
In the opened window, in the bottom, you will see Use access control policy. Click on it.
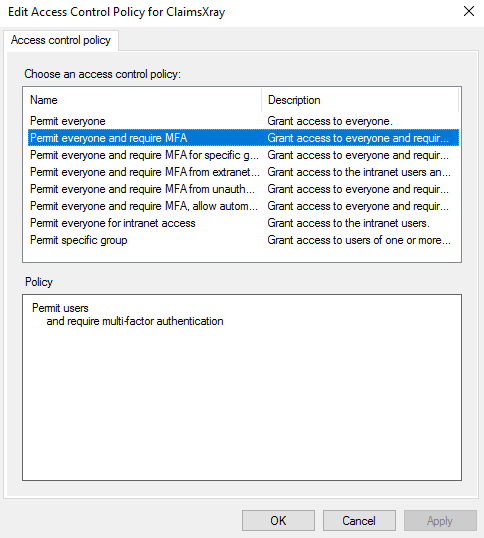
In prompted windows, select Permit everyone and require MFA. You can apply this configuration only to an specific user group if you want.
Apply and Ok. Now this service is protected with Ironchip MFA.
Authentification
Claims XRay Protected Service Test
You can use the Claims X-Ray tool to test Ironchip MFA. Configure it as you can see in next image:
When you click on Test Authentication, you will be redirected to your ADFS.
First, introduce your user and password.
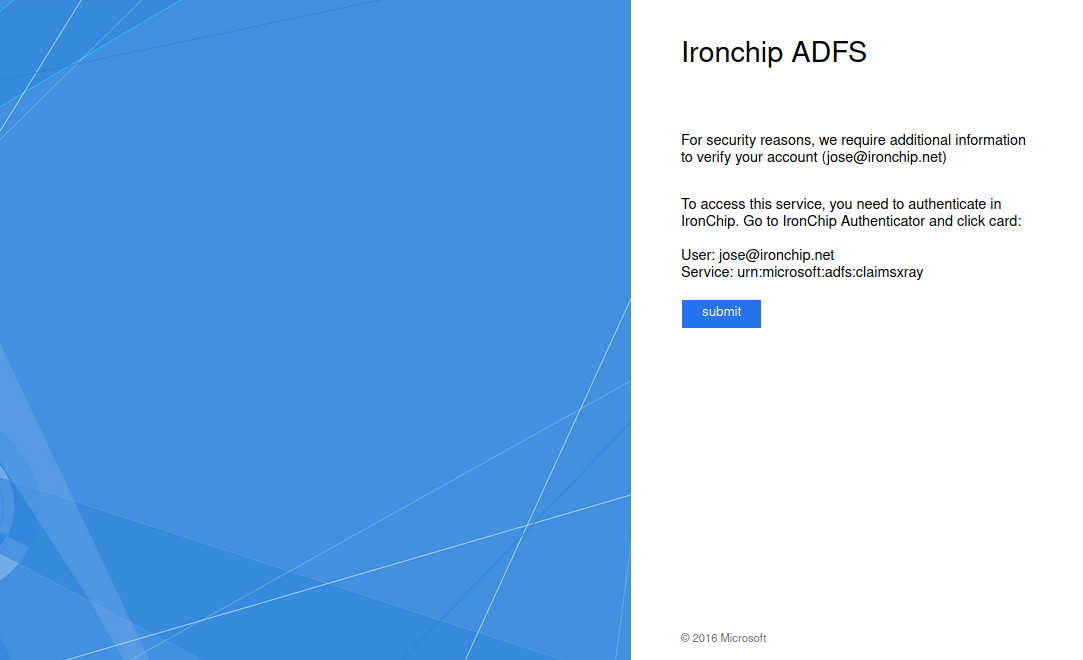
After that you will be prompted to require MFA
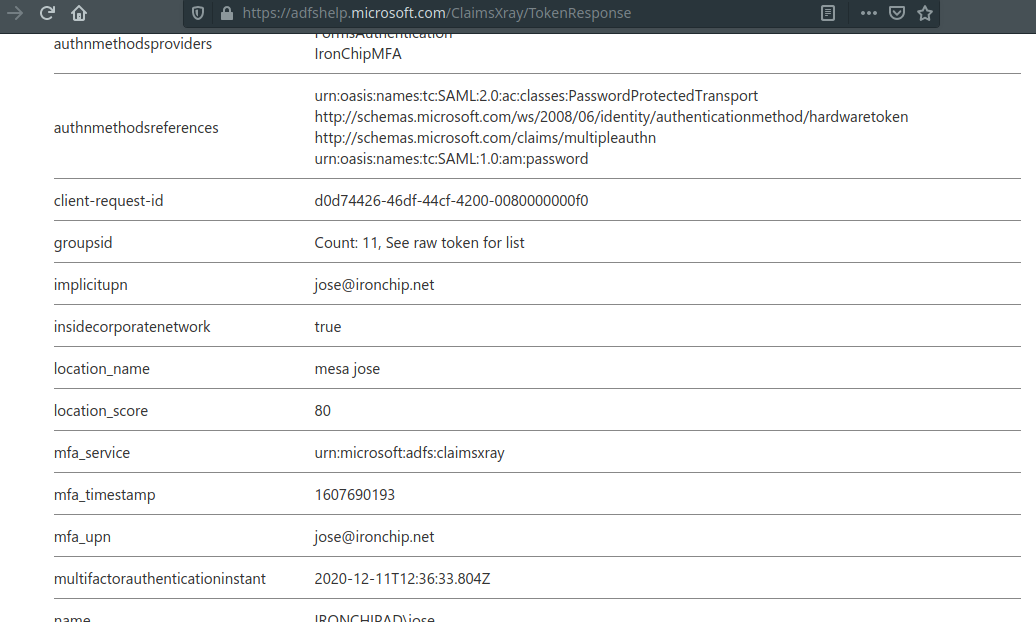
Click on Submit. You will recive a Push notification in application to authenticate using Ironchip Authenticator. Click on push and authenticate. If everything is Ok you will be redirected to this final page:

